

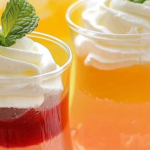
Brighten up your dessert table with these vibrant and refreshing Layered Fruit Jelly Cups. Perfectly balanced with fruity flavors and eye-catching colors, these jelly cups offer a delightful treat that’s both fun to make and even more fun to eat. Topped with whipped cream and a fresh mint garnish, they’re a guaranteed crowd-pleaser at any occasion.
Why You’ll Love This Recipe
Layered Fruit Jelly Cups are not only visually stunning, but they also offer a burst of refreshing, sweet fruit flavors with every spoonful. The beautiful layers of jelly create a colorful effect, making them a perfect dessert for birthdays, parties, or summer gatherings. With the added smoothness of whipped cream and the aromatic freshness of mint, these cups combine texture and flavor in the most delightful way. Plus, they’re incredibly easy to make, requiring just a few simple ingredients and some patience while the layers set.
Ingredients
- 1 package of fruit-flavored jelly (mango, strawberry, orange, etc.)
- 1 cup water (for dissolving jelly powder)
- 1/2 cup cold water (for each layer)
- 1/2 cup whipped cream
- Fresh mint leaves (for garnish)
- 1 tablespoon sugar (optional for whipped cream)
(Tip: You can find the complete list of ingredients and their measurements in the recipe card below.)
Directions
- Start by preparing the fruit-flavored jelly according to the package instructions. Dissolve the jelly powder in hot water and stir well.
- Divide the dissolved jelly mixture into separate bowls, depending on how many layers you want. For example, use three bowls if you want three colorful layers.
- Add food coloring (if desired) to each jelly mixture to create vibrant layers. You can use pink for strawberry, orange for mango, and yellow for lemon, or choose your favorite colors.
- Pour the first layer of jelly into small glass cups, filling about one-third of each cup. Refrigerate for about 30 minutes, or until set.
- Once the first layer is set, pour the second layer carefully over the back of a spoon to avoid mixing with the first layer. Refrigerate again until set, about 30 minutes.
- Repeat with the third layer and chill until completely firm.
- In a separate bowl, whip the cream with a tablespoon of sugar (if using) until it reaches soft peaks.
- Once the jelly layers are set, top each cup with a dollop of whipped cream and garnish with a fresh mint leaf for added freshness and elegance.
- Serve chilled and enjoy the colorful, fruity treat!
Servings and Timing
- Servings: 4-6 cups
- Prep Time: 20 minutes
- Cooking Time: 2 hours
- Total Time: 2 hours 20 minutes
Variations
- Mixed Fruit Jelly: Use a combination of different fruit-flavored jellies (like blueberry, raspberry, and peach) to create even more layers and flavors.
- Vegan Version: Substitute regular jelly with agar-agar powder for a plant-based option. You can also make dairy-free whipped cream using coconut cream.
- Additional Toppings: For extra texture and flavor, top the jelly cups with fresh fruit like berries, kiwi slices, or chopped mango.
Storage/Reheating
These jelly cups should be stored in the refrigerator in an airtight container to keep them chilled and fresh. They can be kept for up to 3 days. Since these are chilled desserts, they do not require reheating. Just serve directly from the fridge for the best taste and texture.
FAQs
1. Can I use a different type of jelly?
Yes, you can use any fruit-flavored jelly mix you prefer, such as raspberry, grape, or mixed berry, depending on the colors and flavors you desire.
2. How long should I wait between each layer?
Each layer should be allowed to set for about 30 minutes before adding the next layer to ensure the colors don’t mix and that the layers remain distinct.
3. Can I make these jelly cups in advance?
Yes, these can be prepared a day ahead of time and stored in the refrigerator. Just make sure the jelly layers are completely set before adding the whipped cream and mint garnish.
4. Can I use fresh fruit in the layers?
While fresh fruit is delicious, it’s not typically used in layered jelly cups as the fruit may interfere with the jelly setting properly. However, fresh fruit can be added on top of the whipped cream as a garnish.
5. What if I don’t have food coloring?
Food coloring is optional and can be skipped if you want a more natural look with the jellies, or if the pre-colored jelly powders suit your needs.
6. How do I make sure the layers don’t mix when pouring the jelly?
To avoid mixing, always pour each new layer carefully over the back of a spoon, which helps the jelly settle gently on top of the previous layer without disturbing it.
7. Can I substitute the whipped cream with something else?
Yes, you can substitute whipped cream with a vegan or dairy-free alternative like coconut cream or non-dairy whipped topping for a different flavor or dietary preference.
8. Can I freeze these jelly cups?
While it’s possible to freeze these cups, the texture of the jelly may change upon thawing. It’s best to enjoy them fresh for the best texture and flavor.
9. How do I make sure the jelly sets correctly?
Ensure that the jelly is properly dissolved in hot water and that each layer is fully chilled and firm before adding the next. If the jelly is too warm when you pour it, it may mix with the layer below.
10. How can I serve these for a larger group?
You can easily scale up this recipe by using larger cups or serving dishes. Just make sure to prepare more jelly layers and allow them to set properly before stacking additional layers.
Conclusion
Layered Fruit Jelly Cups are the perfect dessert to add a splash of color and refreshing flavor to any gathering. With their simple ingredients, easy preparation, and beautiful presentation, these jelly cups are sure to impress your guests. Whether you’re making them for a birthday party, a summer picnic, or a casual family treat, they’re guaranteed to bring joy with every spoonful!
Print
Layered Fruit Jelly Cups Recipe
- Total Time: 2 hours 20 minutes
Description
These vibrant and refreshing layered fruit jelly cups are a visually stunning dessert with a perfect balance of sweet flavors and colorful layers. The combination of fruity gel, topped with a mint garnish and whipped cream, creates a delightful treat for any occasion.
Ingredients
-
1 package of fruit-flavored jelly (mango, strawberry, orange, etc.)
-
1 cup water (for dissolving jelly powder)
-
1/2 cup cold water (for each layer)
-
1/2 cup whipped cream
-
Fresh mint leaves (for garnish)
-
1 tablespoon sugar (optional for whipped cream)
Instructions
-
Start by preparing the fruit-flavored jelly according to the package instructions. Dissolve the jelly powder in hot water and stir well.
-
Divide the dissolved jelly mixture into separate bowls depending on how many layers you want. For example, use three bowls if you want three colorful layers.
-
Add food coloring (if desired) to each jelly mixture to create vibrant layers. You can use pink for strawberry, orange for mango, and yellow for lemon, or choose your favorite colors.
-
Pour the first layer of jelly into small glass cups, filling about one-third of each cup. Refrigerate for about 30 minutes, or until set.
-
Once the first layer is set, pour the second layer carefully over the back of a spoon to avoid mixing with the first layer. Refrigerate again until set, about 30 minutes.
-
Repeat with the third layer and chill until completely firm.
-
In a separate bowl, whip the cream with a tablespoon of sugar until it reaches soft peaks.
-
Once the jelly layers are set, top each cup with a dollop of whipped cream and garnish with a fresh mint leaf for added freshness and elegance.
-
Serve chilled and enjoy the colorful, fruity treat!
Notes
-
You can mix up the flavors and colors to match any theme or occasion.
-
The whipped cream adds a creamy texture that complements the jelly layers perfectly.
- Prep Time: 15 minutes
- Cook Time: 2 hours
- Category: : 4-6 cups
- Method: Dessert